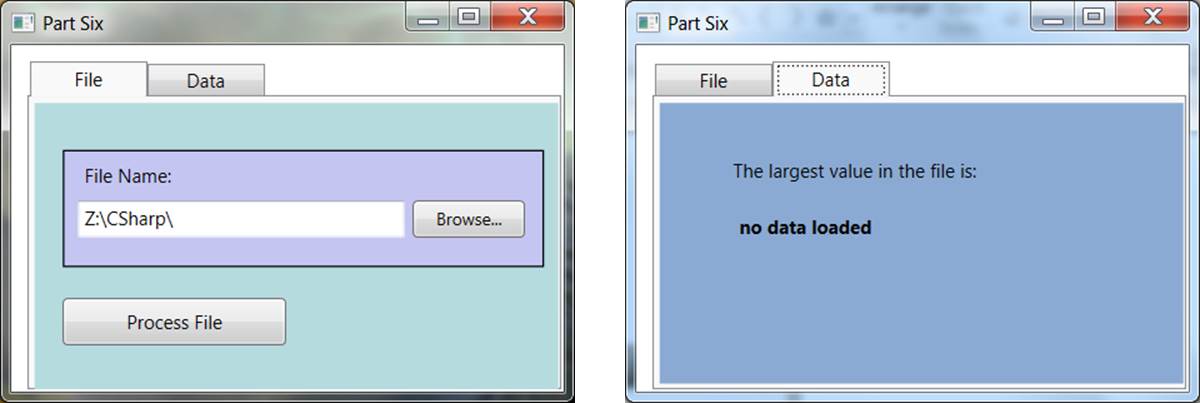
Here is a couple of screen grabs of my version of this assignment. Create a WPF application with two tabs. The top tab should allow the user to indicate a text file to process. The second tab should just display our regular output - the largest integer in the file.
To create this application you will need one new control - the TabControl.
WPF does not include the standard Windows dialog box to select a file, but we can still access that standard control.
Inside the toolbox, select the TabControl. Because we want our entire window to be tabbed, drag your mouse from the upper-left corner all the way down to lower-right corner, then release the mouse button. Hopefully the two tabs take up the whole window. You may have to use Control-Z to undo and try it again.
By default, you should have two tabs. Inside the XAML window you will now find
two <TabItem>s. Change the Headers to "File" and "Data". I also made
the tabs a little wider by setting the width property.
< TabItem Header="File" Width="75" >
You should notice in the XAML window that each TabItem contains just one thing - a Grid. That Grid is what is used to arrange all the labels, buttons, etc.
You can now add all the usual controls to your tabs. Inside the first tab add a "Process File" button, a file name TextBox, and a "Browse Button". Inside the second tab add one or two labels that will show the results. As you can see if the figures above, I also played around with colors, fonts, etc. You should do that too.
Also be sure to change the click property of your Process File button to be something like "btnProcessFile_Click". Double clicking the button in the design window should now take you to the correct function to process that button.
private void btnBrowse_Click (object sender, RoutedEvent e)
{
   // Configure open file dialog box
   Microsoft.Win32.OpenFileDialog dlg = new Microsoft.Win32.OpenFileDialog();
   dlg.FileName = "numbers"; // Default file name
   dlg.DefaultExt = ".txt"; // Default file extension
   dlg.Filter = "Text documents (.txt)|*.txt"; // Filter files by extension

   // Show open file dialog box
   Nullable<bool> result = dlg.ShowDialog();

   // Process open file dialog box results
   if (result == true)
   {
    string filename = dlg.FileName;
    FName.Text = filename;
   }
}
The only thing I added to their code was what to do with the file name. The code in red is what I added.
That line will change the content (Text property) of my text box (which I named FName).
The first part of their code creates an instance of the OpenFileDialog control. That instance is named "dlg". They set several properties of the dialog before it appears. For example, DefaultExt sets the default extension to search for. In this application we want to read txt files, but in the next application we will want to look for xls files.
The ShowDialog() method actually displays the dialog so the user can use it.
The user might exit the dialog by clicking Open, or they might just Cancel. We can find that out by looking at Result. If result is true, then the user actually selected a file name, which we can now insert into our textbox.