The application will create a window with one button and one label. When the user clicks the button, the label will display "Hello World".
Windows Presentation Format (WPF) is the newer standard. You have a lot more flexibility with WPF. For example, you can create buttons with pictures - something old windows did not like.
Developing WPF applications has two parts: the appearance and the actions. XAML is the language to describe the appearance of the application. To program the actions of the application, you can use C# or VB. Visual Studio is used to edit C#, but VS can also handle basic XAML editing. Microsoft has special tools for designers to write their XAML, which we will not look at in this course.
Start a new project. Be sure to select the correct Location and to enter a proper Name for the project files. Select WPF as the type of project. You should see something like the image below.
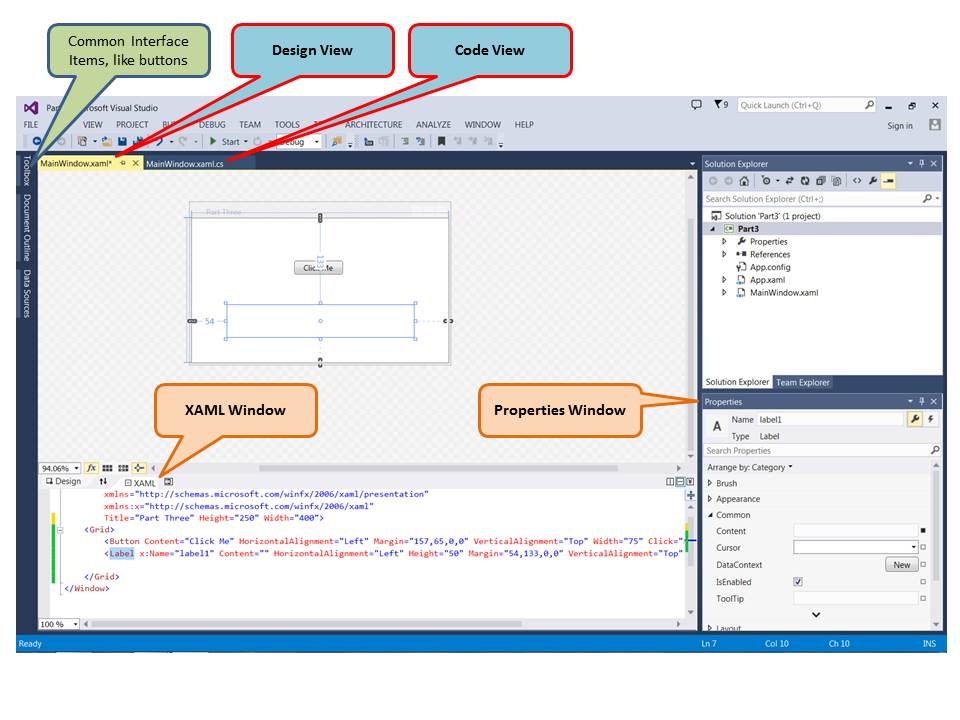
The top pane of the Visual Studio window is the design pane. In this screenshot, I have added a button and a blank label to the design of the application I am building.
The lower left of the VS window is the XAML code to create that application seen in the design pane. You can edit the appearance of your application in either pane. Changes in one pane are changed in the other pane.
In the XAML pane, change the Title of the Main Window to "Part Three". Note that the pane above has changed.
Select the Toolbox, then Common WPF Controls. You should see a list of common GUI elements, such as buttons, labels, images, etc.
Single click button, then click on the application that you are building in the design pain. Congratulations, your application has a button that the user can click.
In the lower right of the Visual Studio window, you should see properties. If not, right click the button you just created and select properties. Initially, the button is labeled just "button". In the properties window, change the Content of the button to be "Click Me". Again, note the design pane and the XAML pane both changed at the same time.
To give the button something to do, go back to Toolbox and add a label to your application. You will need to drag the cursor to indicate the size of the label.
So that we can refer to this label in our C# code, we need to give it a name. Click the label once. Properties should now be the properties of the label. At the very top of properties, find the Name field. Change the name to "label1".
Now let's make the button do something. Double-click the button. You should now see C# code. This is the function that is called when
the button is clicked. Between the { and the } brackets, enter this
label1.Content = "Hello World";
Note that as you type the editor helps you. It should know that label1 is a label and has the Content property.
Now run your application. When you click the button, the message Hello World should appear in the application's window.